Jump to
Before you start
Open the board and choose the list where the task should start.
Choose the board and workflow list for this task. Tasks stay on the board where you create them.
Choose an active teammate who can access the board. An admin can add an active team member to the board when needed.
Know the due date you want to set.
Step 1
Open the board and list
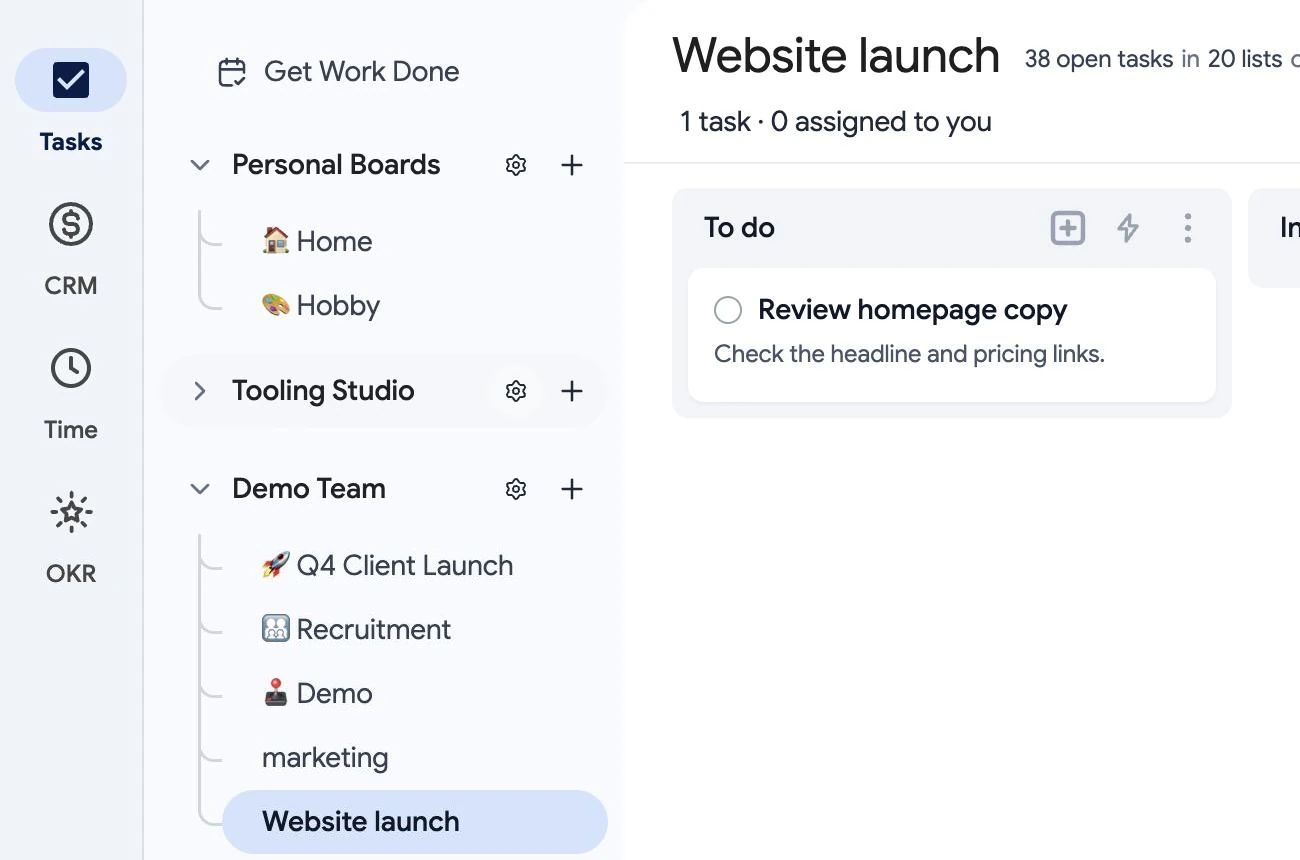
In Tooling Studio, select Tasks. In the left sidebar, expand the team and folder if needed, then select the board. Find the list where the task should start, such as To do.
Step 2
Create the task
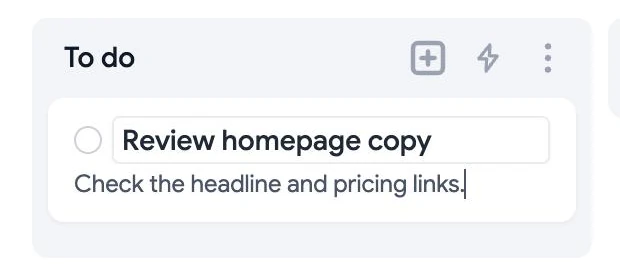
Select the plus icon (Create Task) at the top of the chosen list. Enter a short title. Add any useful context in Notes here... Click outside the editor to save the task.
Step 3
Set a due date
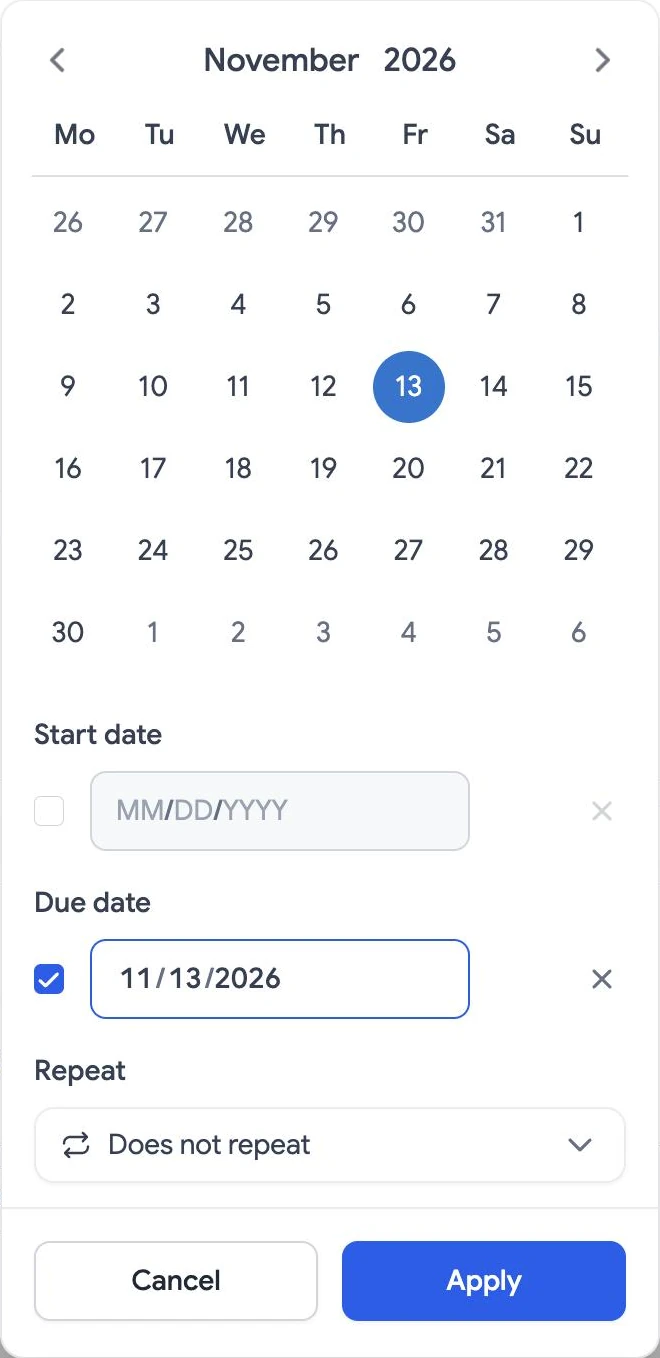
Select the task title to open its details. Select Dates, choose the due date in the calendar, and select Apply. The due date appears in task details and on the task card.
Step 4
Assign the task
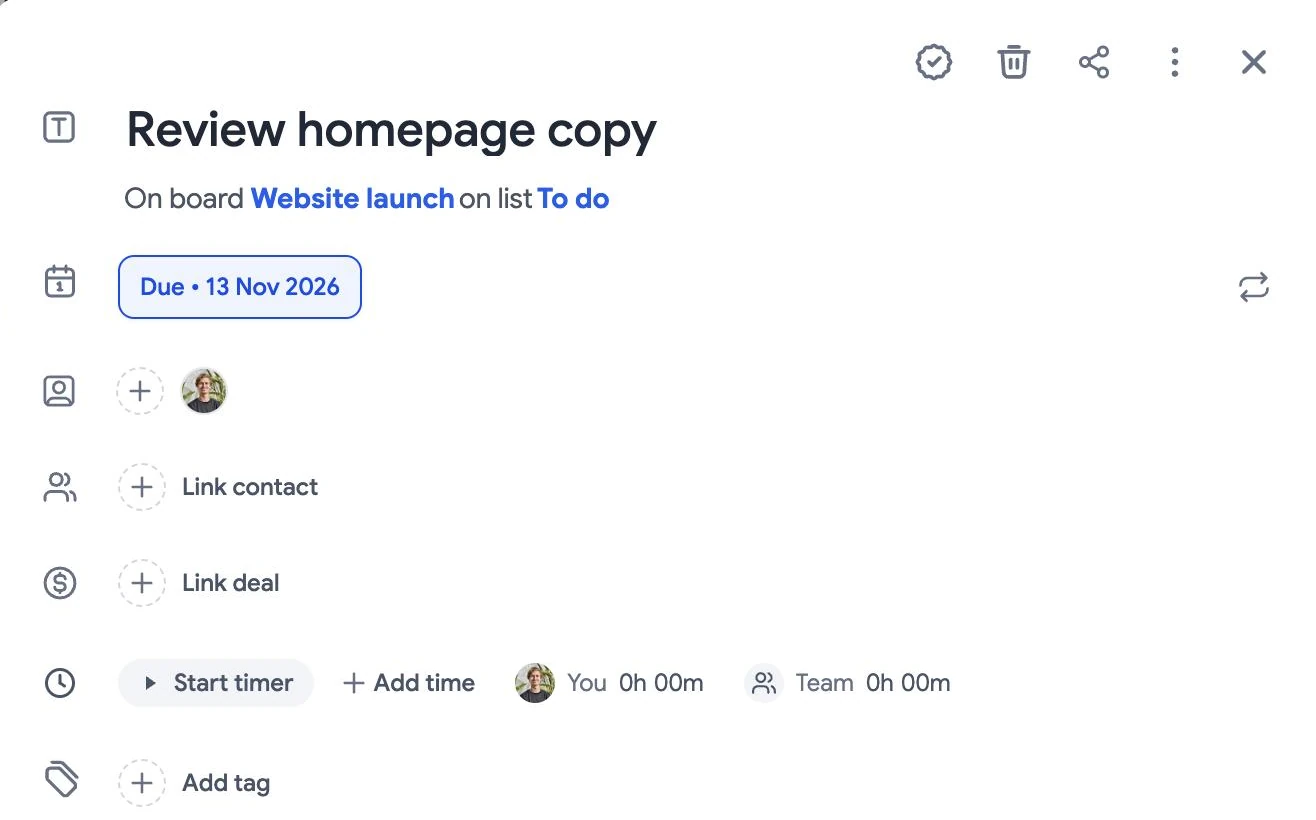
In task details, select the plus beside Assign task. Select an active teammate from the list. Check that their avatar appears beside the assignment control.
If the teammate is not on the board, select their name and confirm Add and assign. This gives them board access. Tooling Studio can send an email or an in-app notification based on their notification settings.
Step 5
Check Assigned work
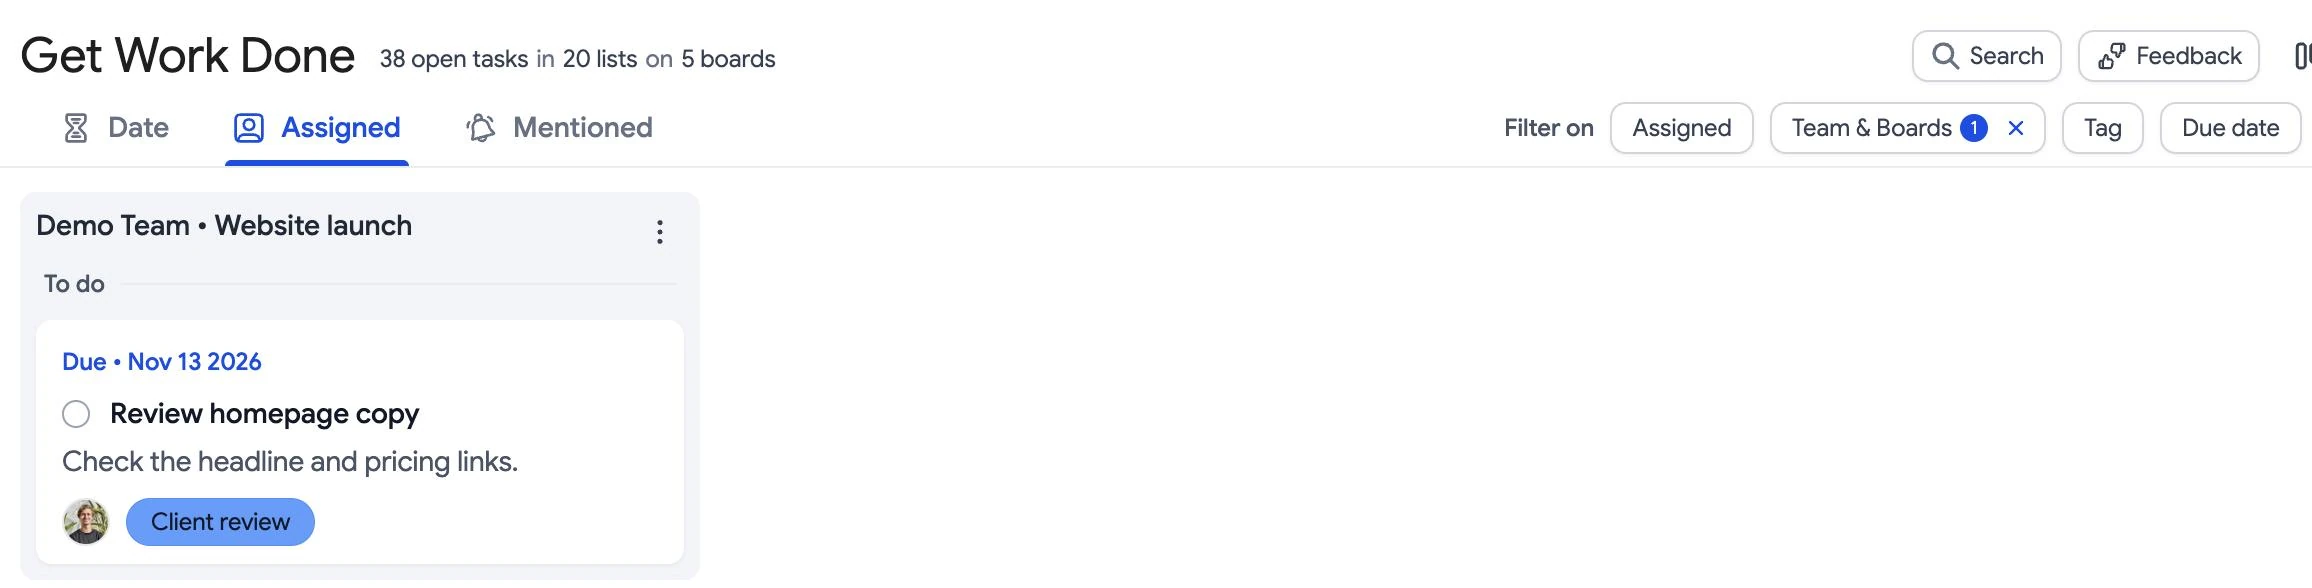
Select Get Work Done in the left sidebar, then select Assigned. This view shows tasks assigned to your account across boards. If the list is long, open Team & Boards and select the board to filter the view.
If you assigned the task to someone else, that person can find it in their Assigned view. You can also check the assignee on the task card in the board.
Can't find the task in Assigned?
Open the task and check its assignee. In Get Work Done, clear any Team & Boards or Due date filters that hide the task. If the board or assignment control is missing, contact support .