Jump to
Before you start
Pick the list where something should happen automatically, such as Done.
Decide what should change: the due date, the start date, a checklist, the owner, completion, or tags.
Decide whether it should happen when a task arrives in the list or when it leaves.
Step 1
Open the list’s automations
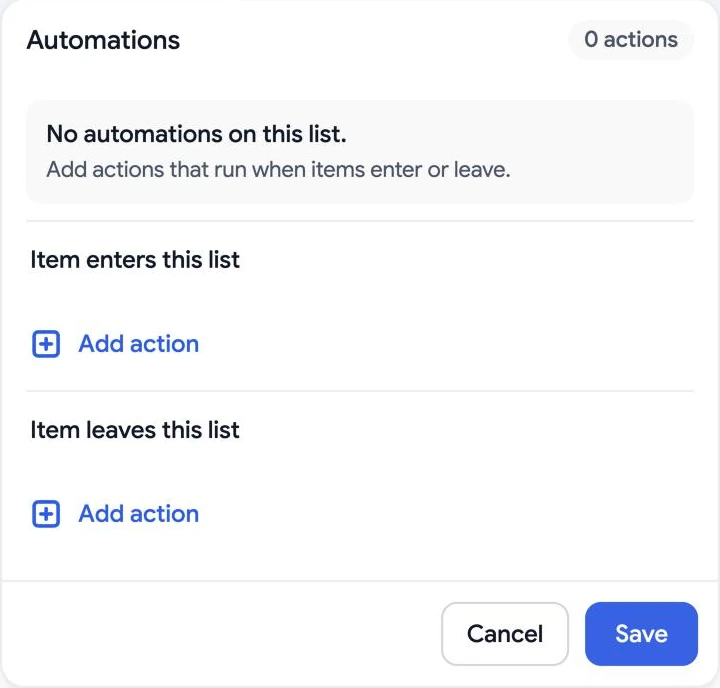
Select the lightning icon in the list header. The Automations panel has two triggers: Item enters this list and Item leaves this list.
Step 2
Choose an action
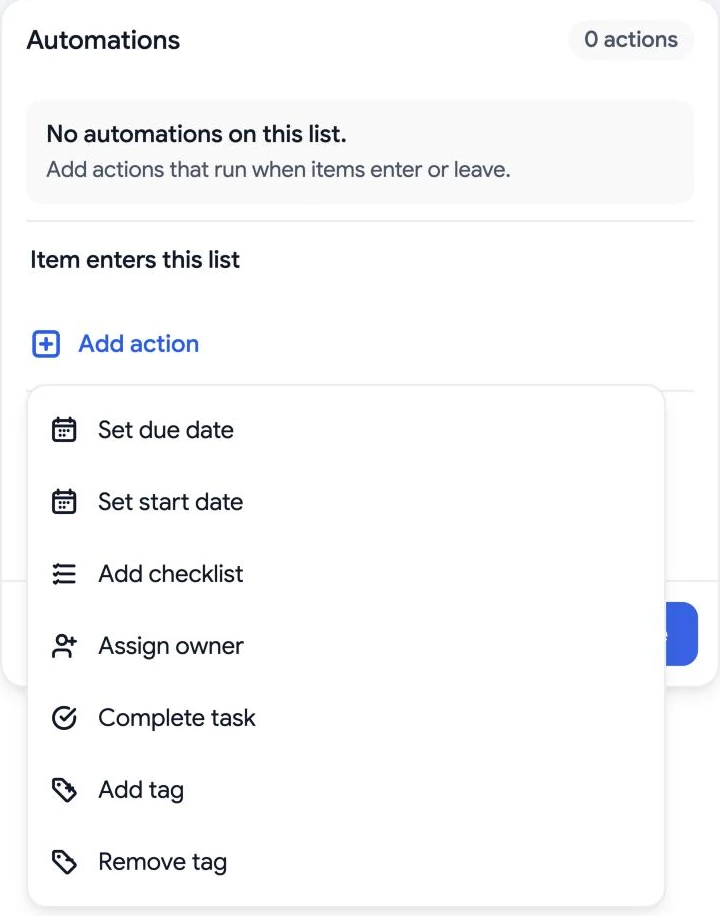
Under the trigger you want, select Add action and choose: Set due date, Set start date, Add checklist, Assign owner, Complete task, Add tag, or Remove tag.
Step 3
Set up the action and save
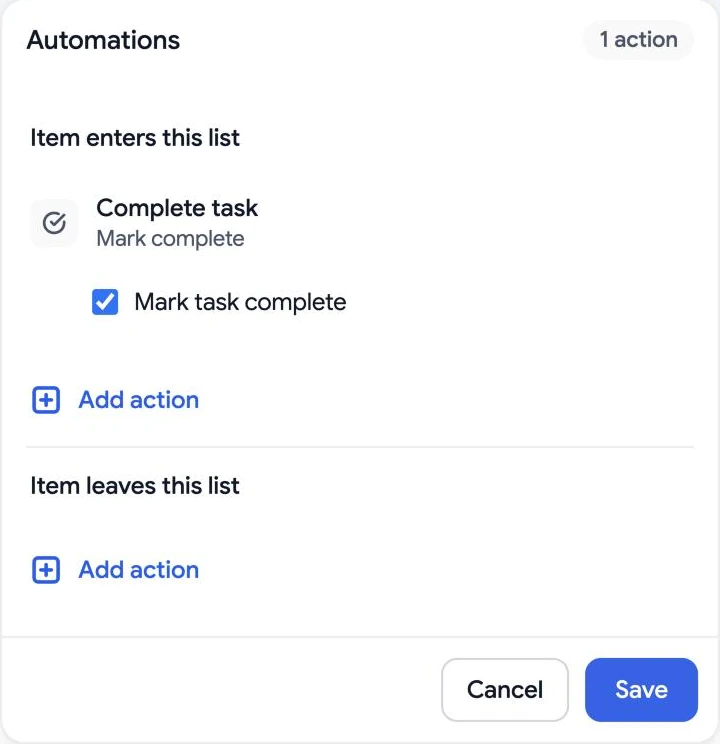
Fill in the action’s settings. For Complete task, keep Mark task complete ticked. Add more actions if you need them, then select Save.
Step 4
Check that it is on
A list with automations shows an orange lightning icon. Select it again to change or remove actions.

Automation not doing what you expect?
Open the list’s lightning icon and check that the action sits under the right trigger and that you saved it. For more help, contact support .