Jump to
Before you start
You need a team workspace and permission to manage its members. Keep the teammate’s email address ready.
Use the email address your teammate will use to sign in with Google.
Decide which products and boards they need. Product access is charged per user; the invite screen shows the current rate before you send it.
Choose Member for day-to-day work. Choose Admin only if the person must manage members, settings, access, or billing.
Step 1
Open team settings
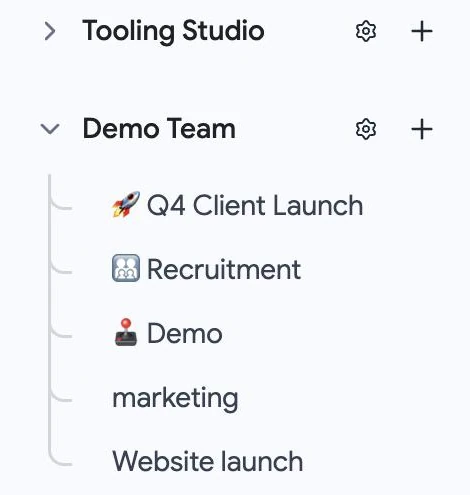
Open Tooling Studio and select the team you want to add the person to. In the left sidebar, click the settings icon next to the team name.
Step 2
Open Members and select Invite Users
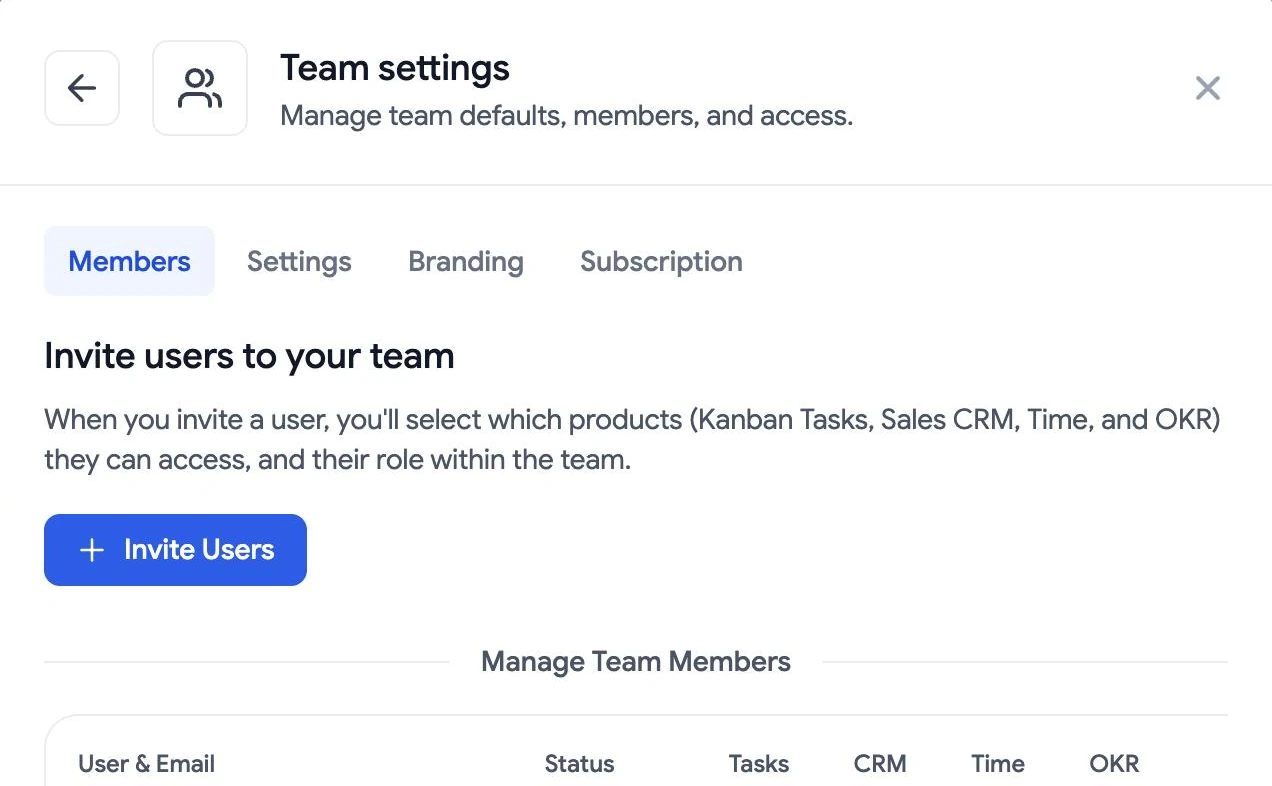
In Team settings, open Members. The list shows who already belongs to the team. Select Invite Users to add someone.
Step 3
Enter the email address and role
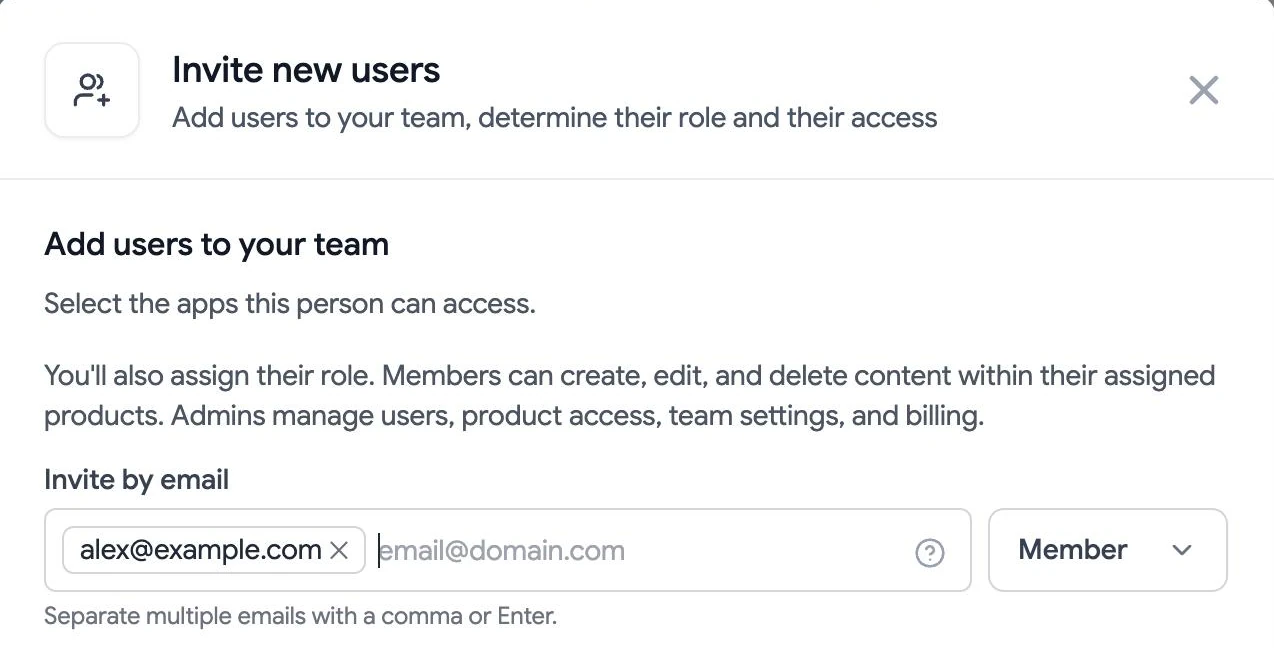
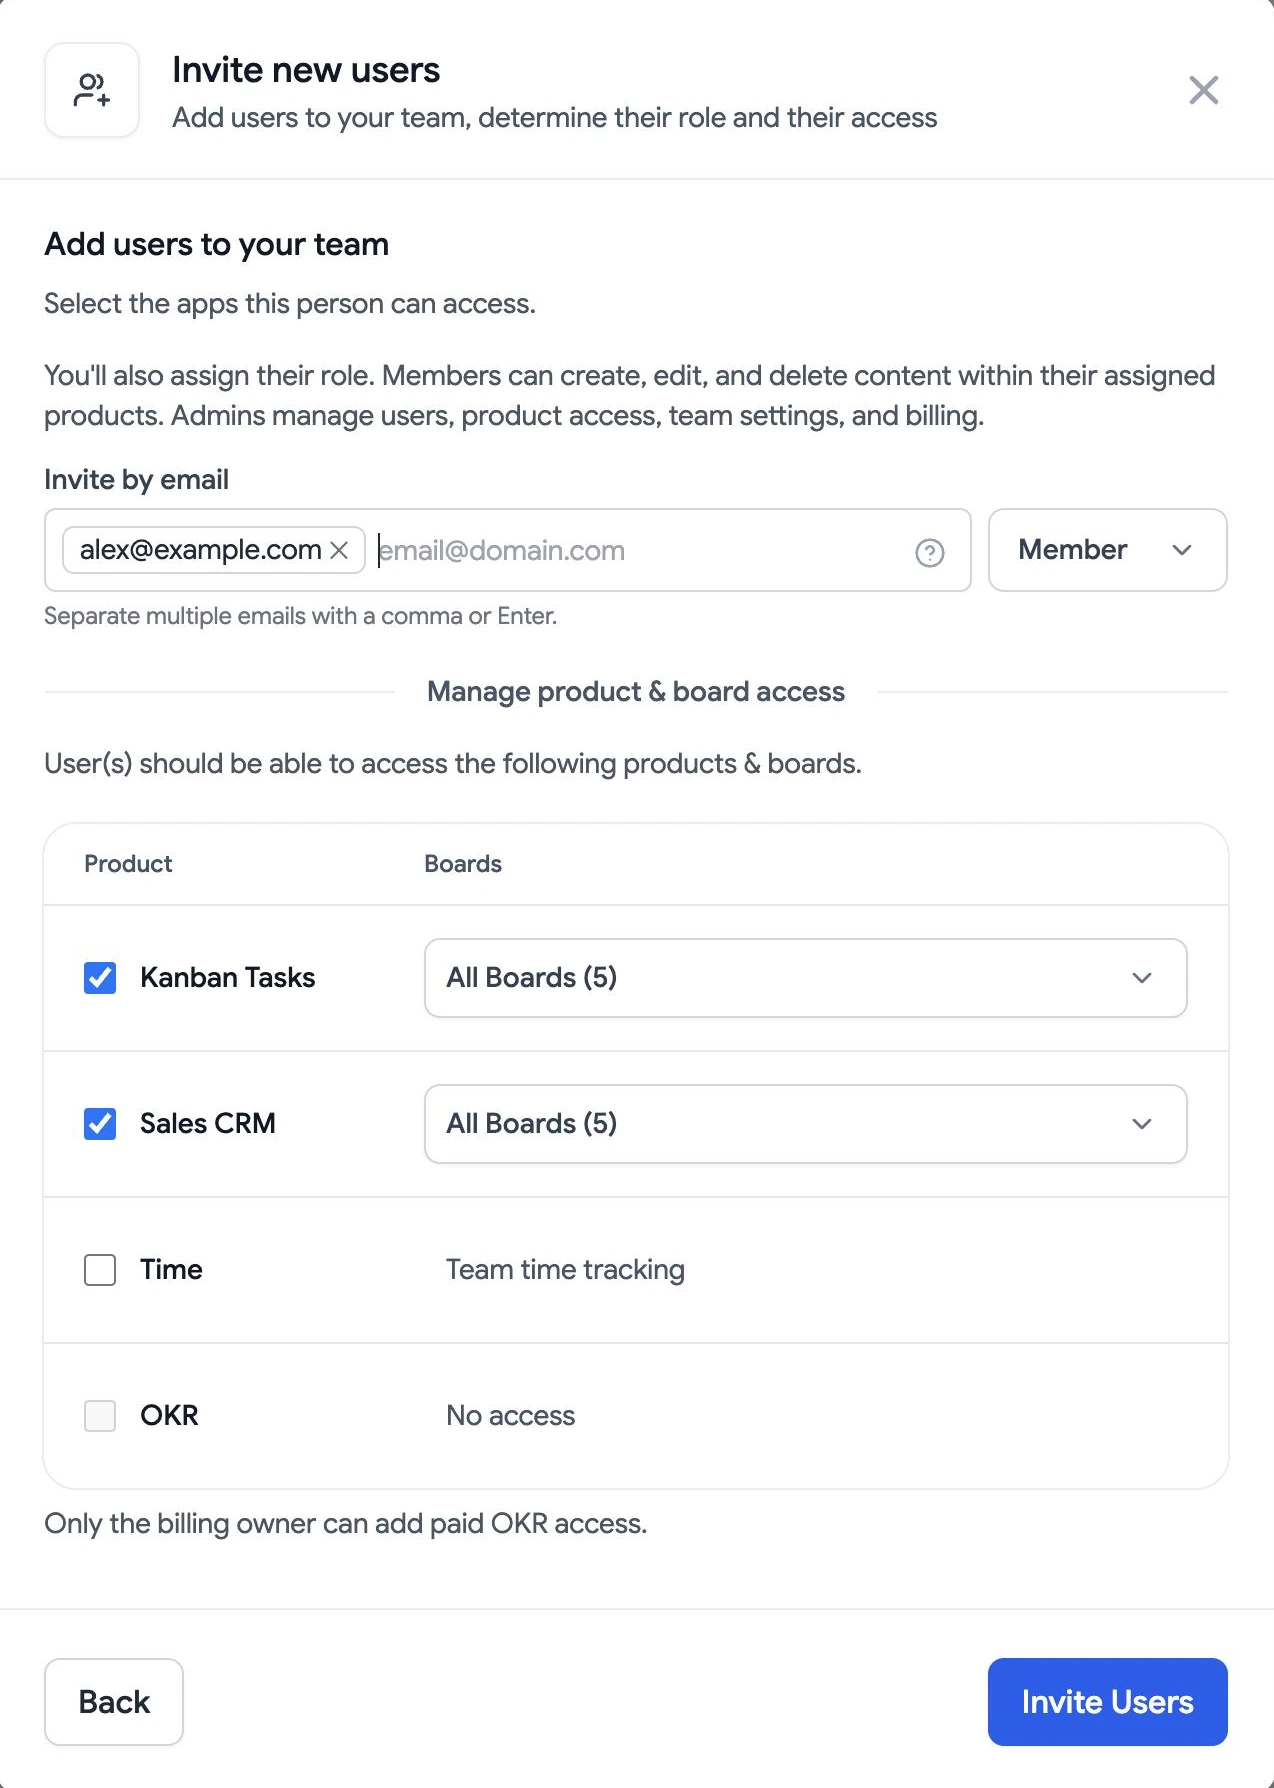
Type the teammate’s email address and press Enter. Leave the role as Member for normal collaboration. Select Admin only when the person needs to manage the team.
Step 4
Select products and boards
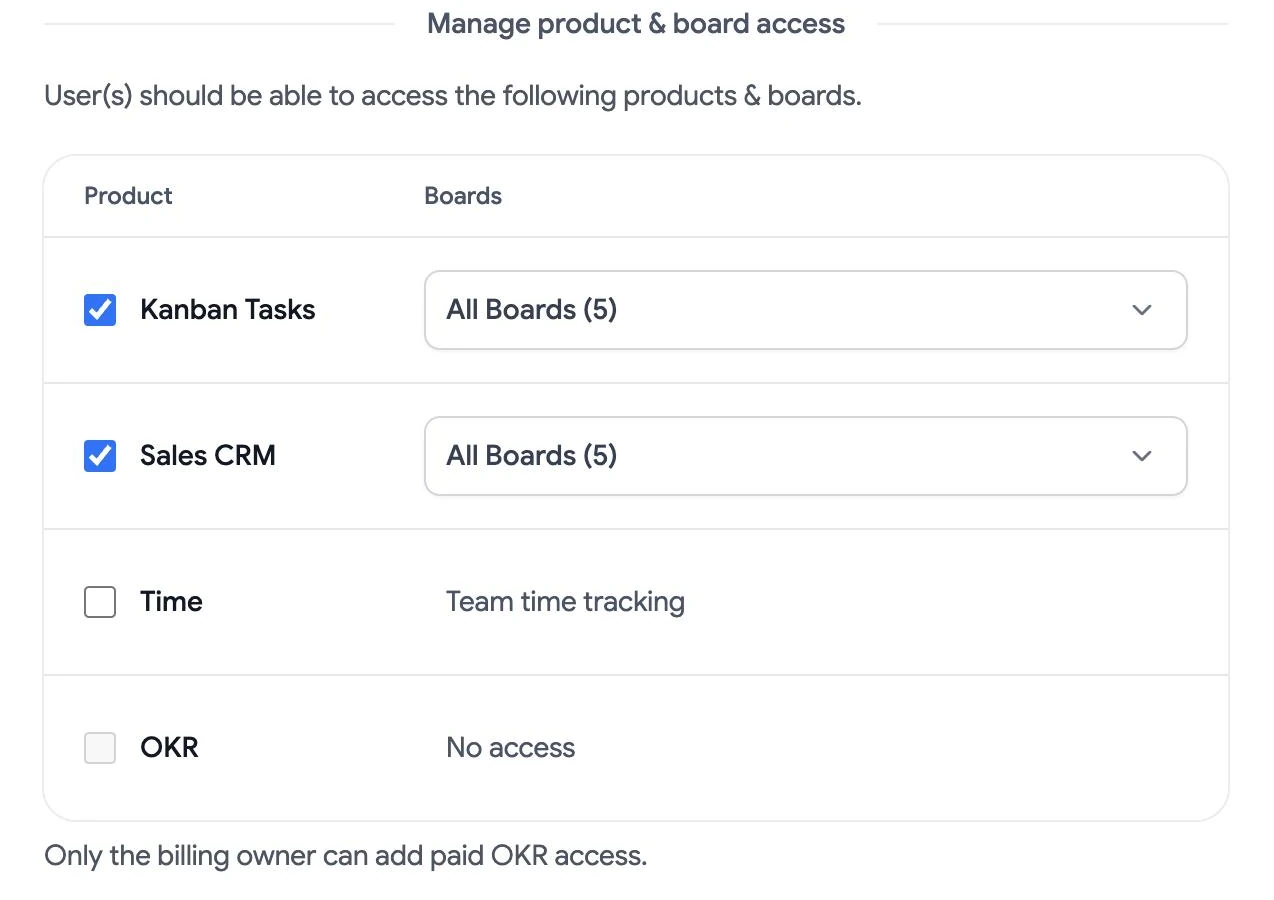
Tick each product the person needs. Existing boards are selected by default, so open the board menu for Kanban Tasks or Sales CRM and remove any boards they should not see. Time gives them access to team time tracking. OKR adds a paid OKR seat; only the billing owner can add it. Review the selection before you send the invite.
Step 5
Send the invitation
Select Invite Users. The new person appears in the team member list with a pending invitation. They can join by opening the invitation and signing in with the same Google account you entered.
If Invite Users is disabled, check that you entered a valid email address and selected at least one product. If the invitation does not appear in their inbox, confirm the address in the pending member row before you send another one.
Need to change access later?
Return to Team settings → Members to review the member’s role and product access. If you need help with an invite, contact support .