
Outline Google Docs Like a Pro
Learn to outline Google Docs effectively. Use headings & the outline pane to organize, navigate, & act on your documents. Master basic to advanced workflows.
You already know the pattern. A project starts in a Google Doc because it's fast. Notes go in first. Then goals. Then a rough timeline. A few comments appear from teammates. By the second week, the document has turned into a long scroll of paragraphs, bullets, and half-decisions.
That’s the point where teams often split their work across too many places. The plan lives in the Doc. Tasks move to email. Decisions get buried in comments. Status ends up in chat. The problem isn’t that Google Docs is too simple. The problem is that such teams never give the document a structure strong enough to carry the project.
The outline google docs feature fixes more than navigation. Used properly, it turns a loose document into a practical working system. Headings create order. The outline gives that order a visible shape. From there, a document can act as a single source of truth for planning, review, and execution.
Structuring Your Document with Headings
The outline doesn’t start in the sidebar. It starts in the document itself.
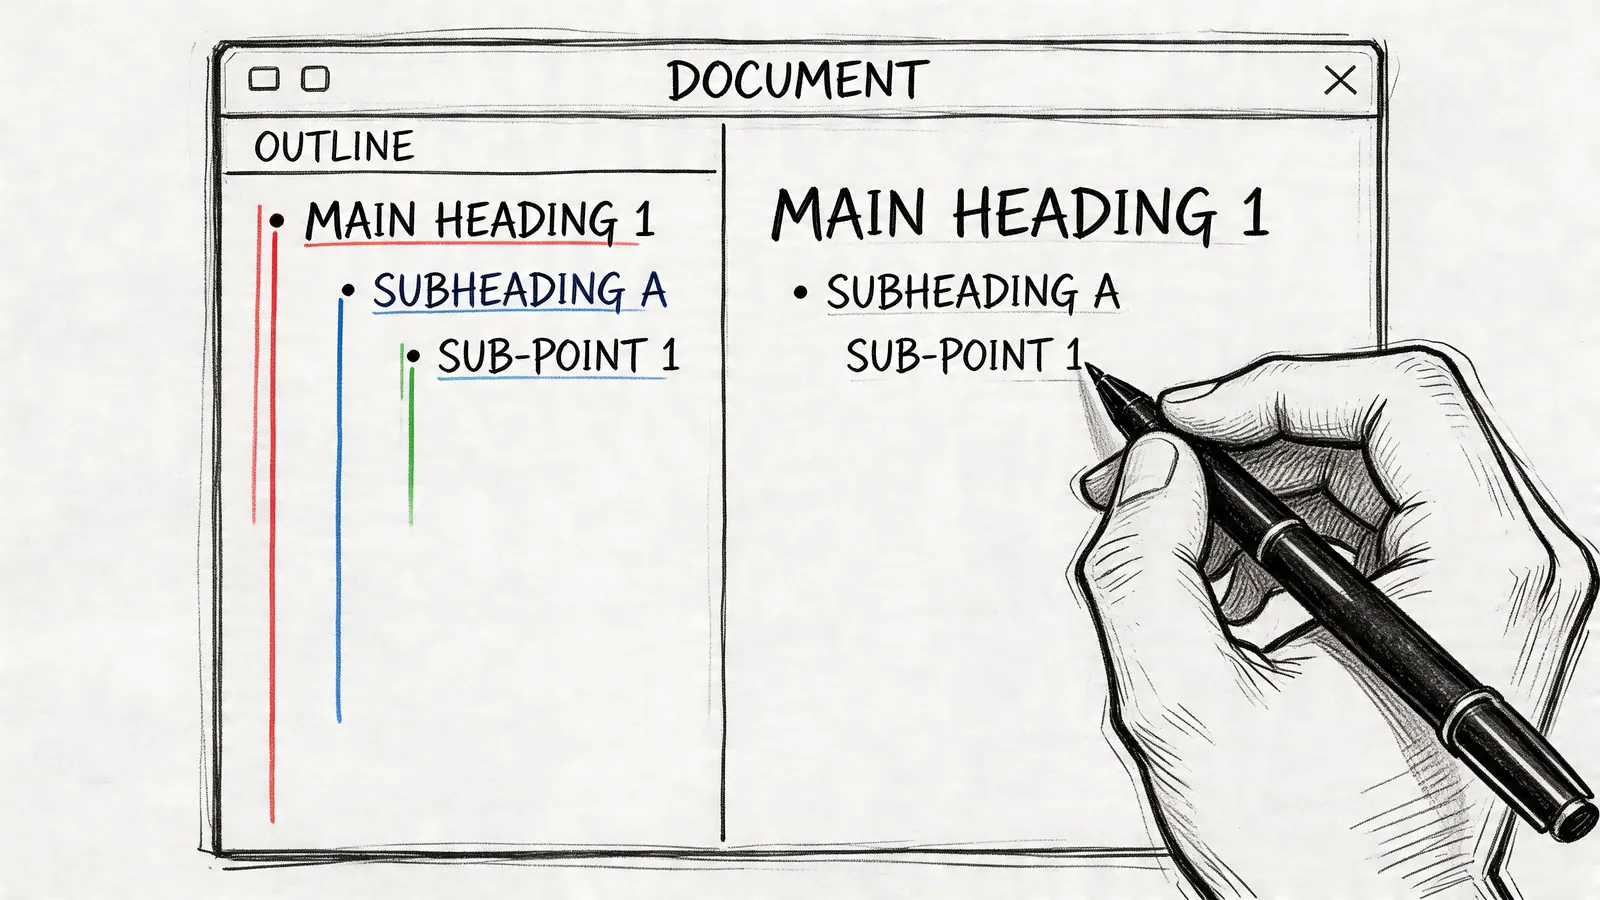
Google Docs automatically builds the outline from Heading 1 through Heading 6. The outline updates in real time as you apply heading styles, which is why it behaves differently from a static table of contents. The feature is available through View > Show outline, and it generates a clickable navigation pane from your headings as you work, as described in this Google Docs outline overview.

Build the hierarchy before you write too much
A clean document usually needs only three heading levels.
- Heading 1 for major sections. Use this for the top-level parts of the document, such as Project Overview, Scope, Risks, and Timeline.
- Heading 2 for major components inside each section. Under Scope, that might be Deliverables, Dependencies, and Open Questions.
- Heading 3 for detail that needs to stay grouped. Under Deliverables, you might use Internal Review, Client Review, and Final Approval.
That structure matters because headings do two jobs at once. They make the document easier to read, and they create a reliable outline that the team can follow.
Practical rule: If a section is important enough to discuss in a meeting, it’s important enough to get a heading.
A simple project brief might look like this:
| Heading level | Example |
|---|---|
| Heading 1 | Launch plan |
| Heading 2 | Objectives |
| Heading 2 | Deliverables |
| Heading 2 | Timeline |
| Heading 3 | Week 1 review |
| Heading 3 | Week 2 revisions |
That’s enough to make the document useful before a single task is assigned.
Apply styles the right way
Many people format headings manually. They bold a line, increase the font size, and assume Docs will treat it as structure. It won’t.
Use the toolbar’s style dropdown. Select the line, click Normal text, then choose the correct heading style. Once you do that, the outline populates automatically.
A few habits make this work better in real projects:
- Name sections for decisions, not topics. “Launch Risks” is more useful than “Misc.”
- Keep headings short. If a heading reads like a paragraph, it won’t scan well in the outline.
- Use parallel wording. If one H2 starts with a noun, the others usually should too.
Teams that write proposals or internal plans often overlook presentation. If your document also needs to persuade, not just organize, strong section structure pairs well with clear visuals. This short guide to visual storytelling is useful for thinking about how headings, images, and narrative support each other.
Formatting also matters for readability once the structure is in place. If you need cleaner spacing for handoff documents or review drafts, this guide to double spacing in Google Docs is a practical companion.
What works and what doesn’t
What works is simple. Write the headings first, even if the sections are empty. That gives the document a backbone. Then fill it in.
What doesn’t work is waiting until the document is already messy and trying to “add an outline” later. At that point, you’re usually fixing structure that should have been set upfront.
Navigating and Organizing with the Document Outline
Once the headings are in place, the outline becomes the fastest way to use the document.
On desktop, turn it on with View > Show outline. On mobile, use More > Show document outline. Google Docs places the outline in a sidebar so you can jump to any section instantly. That matters in large working documents, especially in teams where people revisit the same file throughout the week. Software Advice notes that Google Workspace powers 70% of Fortune 500 companies in major markets, and frames the outline as a native way to reduce app switching inside document-heavy workflows in its guide to using Google Docs outline.
Use the outline like a control panel
Users often click a heading in the outline once, think “nice,” and move on. The better use is operational.
If you run a project review from a single Doc, the outline becomes the meeting agenda. If you manage a proposal, it becomes the fastest way to jump between pricing, scope, and approvals. If you own a sales document, it keeps discovery notes and next steps in one place.
Here’s where it helps most:
- During live meetings. Jump straight to Risks or Decisions without scrolling.
- During edits. Move quickly between sections that need revision.
- During review cycles. Check only the parts assigned to you, instead of re-reading the whole document.
A long document becomes manageable when each section feels like its own workspace.
Collapse clutter and keep focus
The outline is useful because it reduces visual noise. Dense documents make people lose the thread. A collapsed view restores it.
Use collapse and expand controls when you only want to focus on one part of the document at a time. This is especially helpful in files that carry planning, stakeholder notes, and execution details together.
A practical pattern for project work:
- Morning review. Keep only active sections expanded.
- Stakeholder review. Expand summary sections and hide working notes.
- Final pass. Expand everything to check for gaps in flow.
That’s a small change, but it makes shared documents feel less chaotic.
A quick walkthrough helps if you want to see the feature in action:
Reorder the story before you rewrite it
The outline is also where you test document flow.
When a plan feels off, the problem often isn’t the writing. It’s the sequence. Scope appears too late. Risks are buried. Next steps sit below background material nobody needs first.
A better approach is to reorganize sections before you rewrite sentences. Think in terms of order:
| If the reader needs | Move this higher |
|---|---|
| Context first | Overview |
| Clarity on ownership | Roles and responsibilities |
| Approval confidence | Risks and mitigations |
| Actionability | Decisions and next steps |
What doesn’t work is treating the outline as a passive map. It’s more useful as an editing surface. If the structure changes, the document gets better without much extra effort.
Advanced Outline Techniques for Power Users
The basic feature is easy. The useful part is learning where it breaks, where it helps, and how to keep it reliable when more people touch the file.
Power users usually care about three things. Speed. Consistency. Recovery when the outline stops behaving as expected.
Speed up heading work
The mouse is fine for occasional edits. It’s slow for active planning.
If you create project docs often, the primary gain comes from standardizing how you draft them. Start with an empty document and add the heading skeleton first. Then fill each section in under the right level. That keeps the outline stable from the first draft onward.
A practical drafting sequence looks like this:
- Create all Heading 1 sections first. This gives the document a fixed top-level structure.
- Add Heading 2 sections under each major block. These become the working areas for discussion and edits.
- Use Heading 3 only when a subsection needs its own owner, review cycle, or status discussion.
That last point matters. Too many H3s create a noisy outline. Too few create flat documents that are hard to follow.
Keep the hierarchy accessible
A lot of teams think of headings as visual formatting. They’re not just visual. They’re structural.
A logical hierarchy matters for screen readers such as NVDA and JAWS. Skipping from H1 to H3 without a reason creates a broken experience for people navigating by heading level. Google’s support guidance is often used as a reference point here, and it aligns with a broader accessibility principle: use headings in order and keep the structure predictable in Google Docs accessibility guidance.
If a teammate relies on heading navigation, a sloppy outline isn't a minor formatting issue. It blocks access.
This is also where project discipline and accessibility overlap. A document with sound heading structure is easier for everyone to scan, easier to review, and easier to maintain over time.
Know the mobile limits
The mobile app is good for navigation and light review. It’s not where major restructuring should be conducted.
Use mobile when you need to:
- Jump to a section quickly while traveling or between meetings
- Check status notes in a live project document
- Make small edits inside an existing heading structure
Avoid mobile for bigger cleanup tasks. Deep hierarchy work is harder to verify on a small screen, and subtle formatting problems are easier to miss.
Fix the common outline problems
When users say the outline is broken, the issue is usually one of a few things.
| Problem | Likely cause | Fix |
|---|---|---|
| Heading doesn’t appear | Text is manually bolded, not styled | Reapply a real heading style |
| Wrong nesting level | H2 used where H1 belongs | Reset the heading level and check nearby sections |
| Outline looks cluttered | Too many low-level headings | Remove unnecessary H3 and H4 sections |
| Section disappears after edits | Style was overwritten during formatting | Reapply the heading style to the section title |
A good repair method is to review only the headings, not the body text. Click each section title one by one and confirm the style level. That usually reveals the problem quickly.
What works for complex docs is restraint. Use only the heading levels you need. Keep names consistent. Treat heading structure as part of the project system, not as cosmetic formatting added at the end.
Turning Your Outline into a Project Plan
Most project plans don’t fail because the team lacks information. They fail because the information starts out shapeless.
The useful shift happens when the outline stops being a writing aid and becomes the first version of the plan. A rough list of ideas turns into phases. Phases turn into sections. Sections expose gaps, dependencies, and ownership questions before work starts.

Start with the messy version
A team usually begins with fragments:
- launch in June
- legal review still pending
- homepage copy needs revision
- sales enablement deck not started
- customer email sequence required
That list is useful, but not manageable. The outline gives it shape.
The project lead creates Heading 1 sections like Launch Goals, Deliverables, Risks, Dependencies, and Timeline. Under each, the team adds Heading 2 items that represent actual workstreams. Suddenly the same messy notes become a readable plan.
Use examples that mirror real work
A meeting agenda is one of the simplest examples. Start with headings for Decisions, Blockers, Updates, and Next Steps. During the meeting, notes stay under those headings. After the meeting, the same structure makes follow-up obvious.
A technical report works the same way. Use headings for Background, Current State, Proposed Changes, Risks, and Open Questions. Reviewers can jump directly to their section instead of scanning a long draft.
A shared knowledge base also benefits from this approach. Teams can create top-level headings for onboarding, process, client guidance, and troubleshooting. The outline then becomes the front door to the document, not just a side feature.
The strongest project docs don't separate planning from documentation. They use one structure for both.
Handle complex plans without losing clarity
Basic tutorials usually stop at a few heading levels. Real projects often go deeper. One source notes 40% growth in Google Docs use by SMBs reported in 2026, and points out that teams increasingly deal with outlines that involve 10+ levels, sync lag, and hierarchy export questions in more advanced workflows, as discussed in this Google Docs outline video reference. That future-dated figure should be read as a reported projection in the source context, not as a present-day baseline.
In practice, once a document gets that deep, the answer isn’t “use more headings.” It’s usually “split the document” or “tighten the structure.” A project plan should stay readable by people who weren’t in the room when it was drafted.
If you need help shaping the top layer of a plan before it goes into Google Docs, these free product roadmap templates are a useful reference for how to organize phases, priorities, and delivery windows without overbuilding the document.
For teams that want a broader operating model around shared docs, tasks, and visibility inside Workspace, this guide to Google Workspace project management is a practical next read.
What a strong planning outline looks like
A solid project outline usually answers five questions quickly:
- What are we doing
- Why does it matter
- What has to be delivered
- What could block it
- What happens next
If those answers are visible in the outline, the document is already doing real project work.
From Outline to Action with Integrated Tools
A document becomes a single source of truth when the team can move from reading it to acting on it without rebuilding the plan somewhere else.
That’s where the outline earns its keep. It takes unstructured thinking and gives it a stable shape. Once that shape exists, each heading can represent a decision area, a deliverable, or a next action. The document stops being a place where ideas go to rest. It becomes the place where work is defined.
Keep the document as the planning layer
The best use of an outline google docs workflow is not to cram task management into the document itself. It’s to keep the document responsible for structure, context, and decisions.
That means the Doc should hold things like:
- Project intent so people know why the work exists
- Scope boundaries so side requests are easier to reject
- Open questions so unresolved issues stay visible
- Decision notes so the team doesn’t relitigate the same topic
- Actionable sections that can feed a task system
That last part is where many teams get stuck. They build a solid outline, but execution breaks because tasks still get copied manually into inboxes, chat threads, or spreadsheets.
Turn headings into action points
A simple pattern works well.
Say a project document has these sections:
| Outline item | Execution meaning |
|---|---|
| Draft Q3 marketing email | A task for content owner |
| Legal review | A dependency with a reviewer |
| Update pricing slide | A revision task for sales enablement |
| Approve launch date | A decision assigned to project sponsor |
That mapping is the bridge from plan to work. The heading gives the team context. The task system gives the team accountability.
What works is a clean handoff. When the document says “Draft Q3 marketing email,” the task created from it should use the same language. That keeps the document and the board aligned. What doesn’t work is rewriting everything during transfer. The more translation required, the more drift you create.
A project runs better when the task names match the document headings people already recognize.
Reduce context switching
Context switching is where lightweight systems outperform heavier ones for many Google Workspace teams.
If someone reads the plan in Docs, receives discussion in Gmail, and tracks work in a separate project app, they have to reconstruct the same context every time they move. A lighter setup keeps planning and execution close together. For teams that work primarily in Google’s ecosystem, that often means using tools that stay inside the same environment rather than pulling people into a separate workspace for every update.
This becomes especially useful for:
- Small teams that need shared visibility without formal project software
- Sales teams that want proposal follow-up tied to client communication
- Individual operators who manage deliverables from Gmail all day
- Workspace admins trying to avoid another standalone app rollout
If you’re evaluating what that connected setup looks like inside Google’s environment, these Google Workspace add-ons offer a good starting point.
Use one system for planning and another for flow
The document outline is strong at hierarchy. A task board is strong at movement.
That division is useful. The Doc holds the stable logic of the project. The board shows what’s waiting, active, blocked, or done. When those two layers are kept close, the team gets clarity without losing speed.
For example, a client proposal might use the Doc outline for:
- discovery summary
- solution approach
- pricing inputs
- approval notes
- follow-up actions
The execution layer then tracks outreach, revisions, approvals, and submission. Sales teams often need exactly this split. The proposal stays coherent in the document. The pipeline work keeps moving elsewhere, ideally without leaving the Google workflow they already use.
The practical point is simple. Don’t ask the Google Doc to be a full project tool. Ask it to be the structured source that feeds one.
Frequently Asked Questions About Google Docs Outlines
What’s the difference between a Google Docs outline and a table of contents
The outline is a live navigation pane built from heading styles. It updates as the document changes and helps you move around while working. A table of contents is part of the document content itself and is usually meant for readers.
Use the outline when you’re drafting, reviewing, or managing a long file. Use the table of contents when you need a visible reference inside the document.
Why isn’t my heading showing in the outline
The usual reason is that the line is not using a heading style. Many users bold text or increase the font size manually, but Google Docs only adds real heading styles to the outline.
Select the text and apply Heading 1, Heading 2, or another heading level from the style dropdown. If it still doesn’t appear, clear odd formatting and apply the style again.
Can I remove something from the outline without deleting the text
Yes. Remove the heading style from that line and change it back to Normal text. The content stays in the document, but it no longer appears in the outline.
This is useful for notes, temporary labels, or internal comments that don’t belong in the main document structure.
Can I print or export the outline itself
Google Docs doesn’t treat the outline as a separate printable object. It’s a navigation feature, not a standalone export.
If you need a printable section list, use a table of contents inside the document or create a short summary page from your main headings.
Does the outline work on mobile
Yes, but mainly for navigation and light edits. On mobile, you can show the document outline from the menu and jump between sections. It’s useful when reviewing a file on the go.
For major restructuring, desktop is still the better place to work.
What’s the best heading structure for project documents
Keep it simple. Use Heading 1 for major sections, Heading 2 for workstreams or core topics, and Heading 3 only when a subsection needs separate attention.
If the outline starts looking crowded, the answer is usually fewer heading levels, not more.
If your team already lives in Google Workspace, Tooling Studio helps turn structured plans into manageable work without adding a heavyweight system. Its lightweight tools keep task tracking close to Gmail and the rest of your Google workflow, which makes a well-built Doc outline much easier to turn into action.
 Download our Plugin